Windscreen Assembly

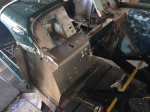
When the hood was going to be fitted I purchased some short thread Tenax pegs for the windscreen but noted some of them wouldn’t fit as the threads were actually too short. On this basis I tried the longer pegs and found the fitted without touching the glass.

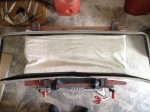
All well and good I thought but it appears this was because the spacer blocks at the bottom of the windscreen were missing allowing the windscreen to drop. This meant the windscreen rubber was loose and dropped out into view.

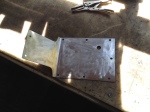
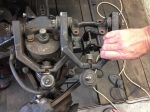
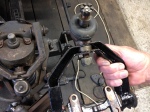
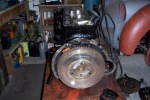
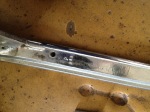
The windscreen assembly has now been completely stripped and the spacer blocks replaced along with the correct thread Tenax. It appears the stanchions have been replaced at some point as they don’t have matching numbers but as these are no longer available they will have to remain.

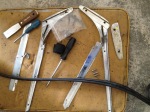
The left hand stanchion is slightly bent due to Fat American Man using the windscreen to pull himself out of the car. We’ll try to bend this back without damaging it.

Bulkhead Repair Panel

The bulkhead repair panel has now been fitted. A blanking plate for the hole left by the brake/clutch reservoir bracket on the other side will be fitted. The original reservoir bracket has been moved to the NS of the bulkhead for the right hand drive conversion.

Note how the bulkhead fits correctly to the repaired inner sill now.

Front Wishbone Damage

Reassembling the front suspension has revealed an issue with the front top wishbones. The wishbones are supposed to have a spacer to prevent crushing when the ball joint is tightened but it appears a previous owner has missed this. This has deformed the wishbones which have now been replaced as per picture below.

Body & Chassis Work

Progress on the Body and chassis has been marching along but as with any project, if you start cutting away exterior body panels, you start uncovering 50 years worth of rot. My body isn’t actually in too bad shape but there was still some work to complete.

The NS bulkhead has been previously had accident damage badly repaired so the NS wing, inner wing, damaged bulkhead area and battery box has been removed. Along with the damaged suspension, this was the actual cause of the body being misaligned on the chassis and it a relief that the cause has now been properly identified and repaired.

This is the repair panel for the bulkhead and the new battery box which will be welded in once all of the other minor repairs (see below) have been completed.

This is the NS inner sill which has rotten away at the end. It has now been repaired.

Engine Progress

Some more updates have come through from Watermill Carriage Company. The main bulk of the work on the car has centred around the engine rebuild and the body, particularly around the front offside inner wings and bulkhead.

As mentioned in a previous post, the engine block was in reasonable condition. The images below show that the lips that the piston liners sit on are in remarkably good condition. There was very little residue in the cylinder walls which are prone to blocking from silt/rust etc.

The head has been rebuilt completely. It has new valves, valve guides and valve seats and has been converted to run on unleaded petrol. The head has been refaced – the marks shown on the bottom of the head are paint that will be taken off with a razor blade before fitting.

The bottom end of the engine has now been reassembled with a reconditioned crank (20 thou oversize), cam, followers, timing chain, oil pump etc. The valve gear was apparently in good working order so has been reused.

The ring gear and pinion has been replaced due to the damage from the incorrect starter. You can also see the new 87mm pistons and liners that have been fitted which will give an overall size of 2138cc which was one of the options available to buyers when the car was purchased new.