Job to do – a quick catchup

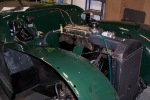
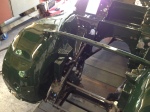
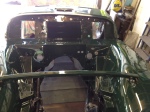
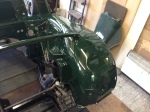
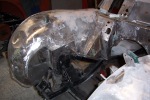
Progress on the car has been coming on nicely so far so I thought I’d pop down a list of jobs to finish as far as I can tell.

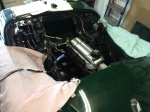
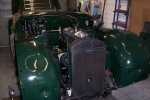
  • Fit exhaust manifold and new stainless steel exhaust
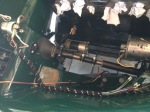
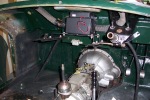
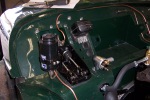
  • Fit inlet manifold and carburetors
    • Replace dampers for new brass
    • Check carbs and rebuild if necessary
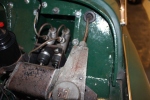
  • Fit distributor (check/rebuild) and ignition system
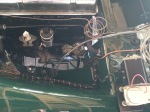
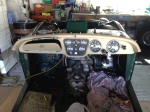
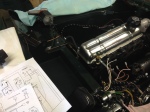
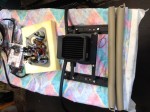
  • Complete wiring
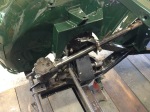
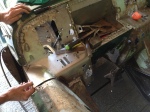
  • Recondition prop shaft UJ’s
  • Recondition differential
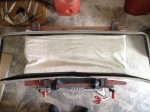
  • Refit interior mirror and windscreen
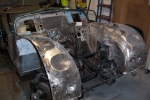
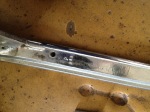
  • Refit bonnet, front bumper and new number plates
  • Paint front wing under wing mirror
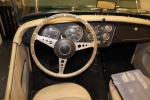
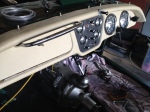
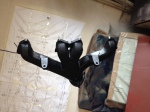
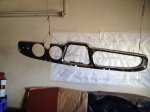
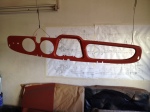
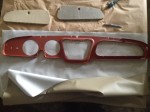
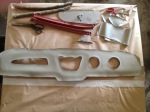
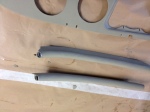
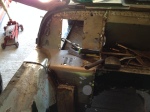
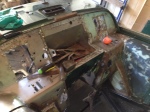
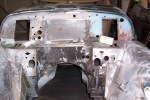
  • Replace interior seats and panels
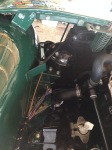
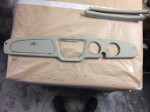
  • Fit adjustable steering wheel and control head
  • Replace doors and align
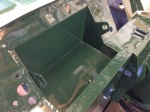
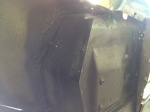
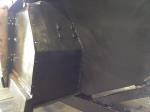
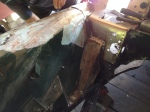
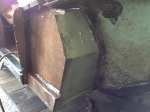
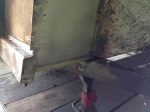
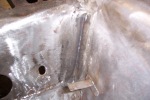
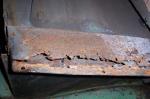
  • Remove fuel tank, weld boot floor. Replace fuel tank
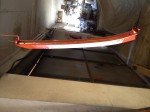
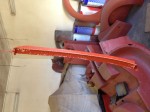
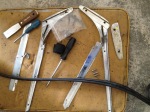
  • Fit weather equipment (sidescreens, hood, tonneau, hood cover)
  • New spare wheel and leather strap
  • New MOT

Things I would like to replace depending on budget

  • Replace wire wheels and spinners
  • Replace headlamps with Lucas PL700 Tripod
  • Replace rear overriders
  • Replace rocker cover or rechrome
  • Replace washer bottle with Lucas glass bottle
  • Paint dynamo black rather than chrome
  • Fit starting handle guides
  • Replace handles and hinges
  • Odometer reset handle on speedo

Under Bonnet Details

I’ve had some more images through which show some interesting under bonnet progress and details

Picture 1 shows the steering column has been installed now and all the sleeves have been painted and reconditioned. You can also see the new gaiter for the steering column – the previous one had been repaired several times with mastic. The new woven fabric wiring loom is in place now and a new brass drain tap has been fitted to the engine.

In picture 2, you can see the new capillary tube for the reconditioned temperature gauge that has now been fitted. The old one was frozen in the thermostat housing. The bracket for the new washer bottle has been fitted and the correct new Lucas ignition coil that I purchased at Beaulieu last year has also been refitted. The engine still retains the original paper type oil filter rather than a screw on conversion. The fuel pump has been retained as this was fitted by the previous owner relatively recently.

Picture 3 shows one of the original high/low horns that has been repainted. The reconditioned radiator has been refitted and the overflow tube routed correctly. The dynamo has been retained (it was reconditioned recently) along with the original wide belt.

In picture 4 you can see the stay rods for the radiator have been painted and refitted. The radiator was recored recently (with the original hole for the starter handle).

Interior Progress

Some more progress has been made on the dashboard which has now been fitted to the car. The right hand drive conversion has now been finished and the dashboard now has the correct chrome grab handle fitted at last. Note also, that the overdrive switch has been fitted.

The new dash panel has been fitted with all new gauges. The console has been restored with the correct crackle black finish. The new choke cable has yet to be fitted (although the “old” choke cable was also new – I’ll keep this for a spare). I know I’ve mentioned it in a previous post, but Frank in the US who reconditioned the panel and gauges is a genius and this really is a work of art.

The old Mota Lita steering wheel is being replaced for the correct original adjustable type steering wheel which is similar in style to that fitted to Austin Healey’s and Series 1 Land Rovers. However, the TR3 one has a unique fitting and is very rare. A new control head will also be fitted as the self cancelling mechanism on the old one was not working correctly.

More Progress

Progress is ramping up with the new wiring loom being fitted now. In conjunction with this the newly reconditioned gauges are being prepared for fitting. This should resolve the shorted out fuel gauge and indicator repeater on the dashboard.

The front apron has also been fitted now so all of the panels with the exception of the bonnet have now been refitted.

An electric windscreen washer system is being fitted although this may be changed next year for a reproduction Lucas washer system with a glass bottle.

More Details

I’m keen for JSK to remain as original as possible. One of the items that seemed to have been swapped out during a previous owners time is the fuel cap. It looks like the TR3 one has been swapped out for a TR250/TR5 cap at some point.

The manifold in my car, while sound wasn’t looking up to much. Although not an original finish, blasting and stripping the exhaust manifold and painting with high temperature paint is very common.

Dashboard

As part of the restoration of the car I decided to convert JSK to right hand drive. There’s an argument about originality and ease of resale (more potential buyers in Europe) but to be honest, I’m not looking to sell the car any time soon and I would prefer the wheel to be on the “correct” side for the UK. One of the biggest issues for a RHD conversion is finding a decent metal dashboard. After all, it was just over 10% of cars that were RHD and most of them have now been scrapped. So finding a RHD original dash in good condition is something of a rarity. Fortunately, a kindly TR Register member took pity on me an supplied all of the parts needed to convert JSK to RHD for a mere ÂŁ250. All the parts were in remarkably good condition so for the dashboard it was a simple matter of sanding, priming and painting to protect it from rust, prior to wrapping in vinyl.

Engine & Gearbox Fitment

The time to fit the engine and gearbox has finally arrived. The gearbox has been fully reconditioned but came with an early TR2 overdrive cover which means overdrive would only work in 4th gear (rather than 2/3/4th as a TR3 should). This cover has now been changed for the correct type and wired in so o/d works in all the right gears. The gearbox is the correct 3 synchro type for the TR3 rather than a four synchro model for a TR4. It’s a common upgrade to change to the four synchro gearbox but I would to keep the car as original as possible. And after all, it’s not difficult to wait to fully stop before engaging first gear. The gearbox is also fitted with the correct short throw gear lever rather than the long one fitted to a TR4. This is important so that your hand doesn’t foul on the bottom of the dashboard when changing gear.

It’s a small detail, but you can see in the first image that the correct lock nut has been fitted to the gear lever. I’ve failed to find the correct threaded nut from either Moss or Rimmer and this should mean the gear knob now fits correctly.

All of the perished/missing blanking grommets have been replaced with new. The heater tap under the bonnet, which looked like it came from someones central heating, has been replaced with the correct brass type, and the reconditioned wiper motor has been fitted.

All of the copper brake and clutch lines are being replaced with new. The previous pipes had been sprayed green when the car was painted last time.

Most importantly you can see the steering column has been fitted now so at last, the steering wheel will be on the “right” side.

Massive Progress Made

I emailed Watermill today for an update after watching the Timeshift program on BBC over the weekend reminded me I still owned a classic British car!

A whole raft of images followed with a description of the work so far. And boy, has progress been swift over the last couple of weeks. All the metalwork has now been finished and the engine bay has been painted. Now the real assembly work can start in earnest.

The steering components have now been fitted and the car is half way to being right hand drive at last.

Engine and gearbox will be fitted this week along with new brake lines in the engine bay (replacing the badly sprayed over ones originally fitted). The dashboard and door cappings (which were missing completely when I bought the car) are in pretty bad shape and will be worked on and covered next week.

Progress on Inner Sills and WIngs

Some more images of the work to the inner wings and sills have come through. The bulkhead repair panel is in, as is the new battery box. The left hand inner wing had to be removed as it had a large hole in the rear where it meets the bulkhead. Unfortunately, the inner sill had also rotted away (see previous posts) but all of this has now been repaired.

All of this is being prepared for paint this week now so things are starting to all go back together. All in all, there has been a huge amount of work completed that hadn’t been factored in at the beginning of the work. If you had suggested that the body would have to be lifted from the chassis and the inner wings removed for such repairs I might not have gone on with the project. However, all the accident damage previously has been repaired properly now and the body will sit straight with all mounts intact (rather than the bodge-it-and-leggit work done previously where one mount was cut and the body jacked up with spacers on the other side). Ultimately, the car has been apart now to its component parts so hopefully there shouldn’t be any more surprises lurking and the car is 100% metal.

These are pictures of the left hand inner sill before and after repair.

Windscreen Assembly

When the hood was going to be fitted I purchased some short thread Tenax pegs for the windscreen but noted some of them wouldn’t fit as the threads were actually too short. On this basis I tried the longer pegs and found the fitted without touching the glass.

All well and good I thought but it appears this was because the spacer blocks at the bottom of the windscreen were missing allowing the windscreen to drop. This meant the windscreen rubber was loose and dropped out into view.

The windscreen assembly has now been completely stripped and the spacer blocks replaced along with the correct thread Tenax. It appears the stanchions have been replaced at some point as they don’t have matching numbers but as these are no longer available they will have to remain.

The left hand stanchion is slightly bent due to Fat American Man using the windscreen to pull himself out of the car. We’ll try to bend this back without damaging it.